.png)
Octopus’s Garden Quilt by Kim Lapacek
- Jan 26, 2019
- 3 min read
The end of the second week of Project QUILTING Season 10 is coming to an end. I went back to my comfort zone for this challenge – Convergence Quilts.
Today I’ll share with you the process I went through to create my quilt “Octopus’s Garden” for the Red, White and Blue Project QUILTING Challenge.
I knew pretty early on that I wanted to do a convergence quilt for this challenge. I was a bit stumped and when I’m stumped – Convergence Quilts is my go to.

But, the key to a good convergence quilt is the colors. I went to my stash and these were the first four I thought I’d give a go on. While looking in the stash I came across some buffalo plaids I had gotten for my friends baby.
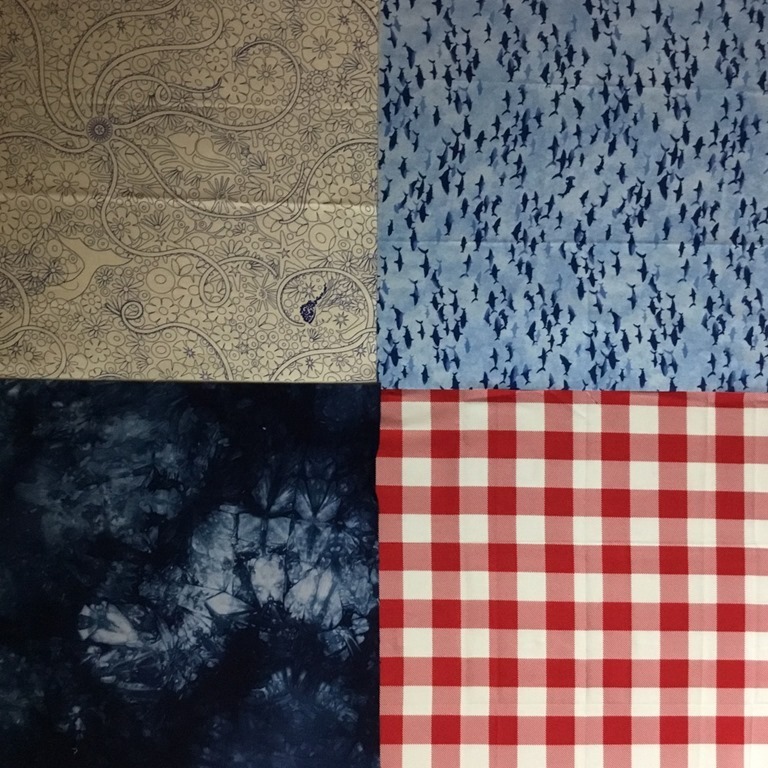
I couldn’t get that out of my mind … so before I knew it – I switched out the Alison Glass red fabric for the buffalo plaid.
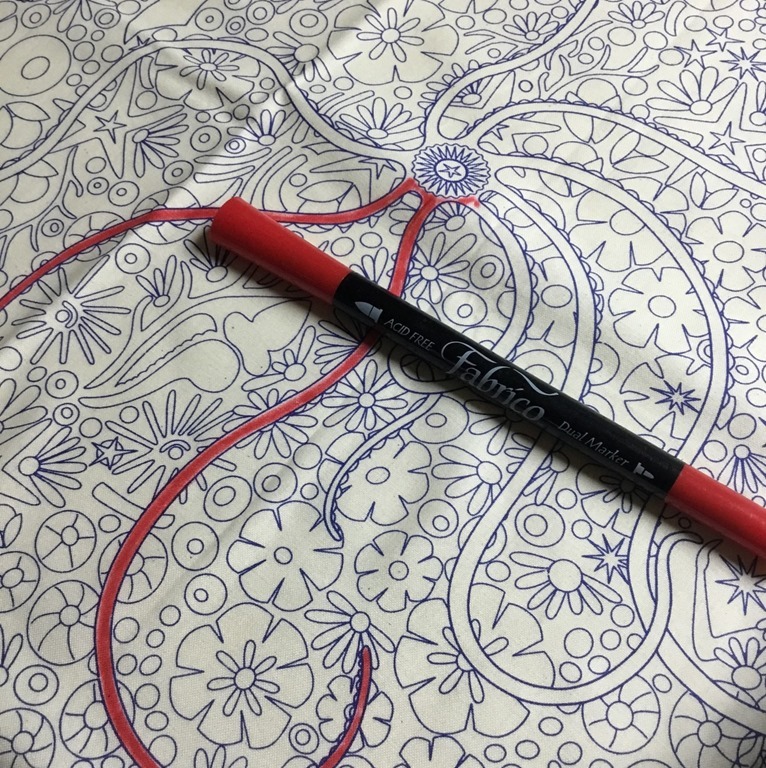
I really liked the Alison Glass Diving Board fabric but I wanted to jazz it up just a bit for this project. So – I started by coloring in some of the Ocotopus with a Fabrico marker.
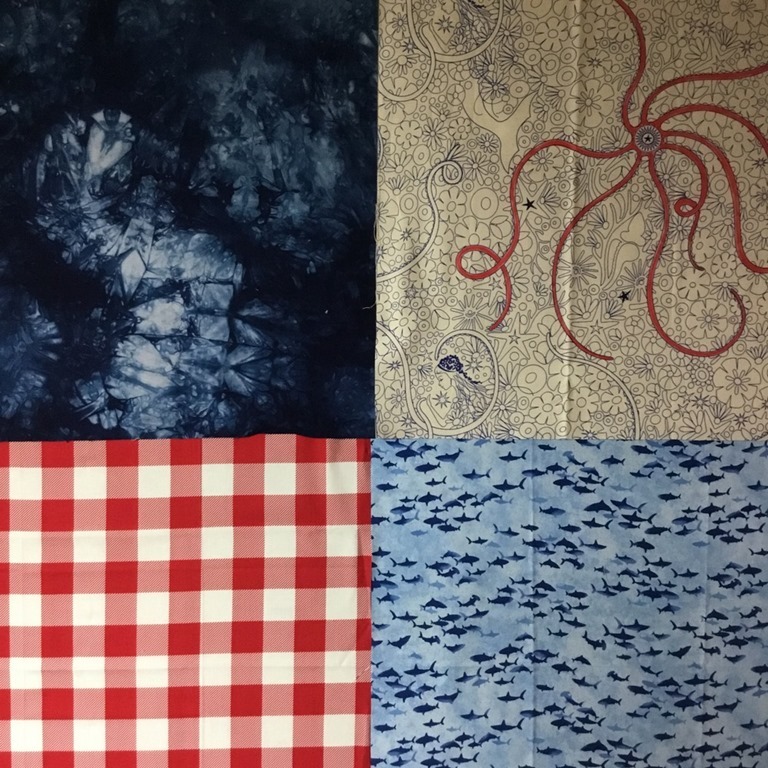
And here’s what the adjusted four fabrics look like – a hand-dyed, a white print from Alison Glass, a buffalo plaid red and some fish on blue!

I accidentally cut the wrong side of my second panel so I had to tweak my strips a bit to make the octopus flow through the strips. I’m ok with it.
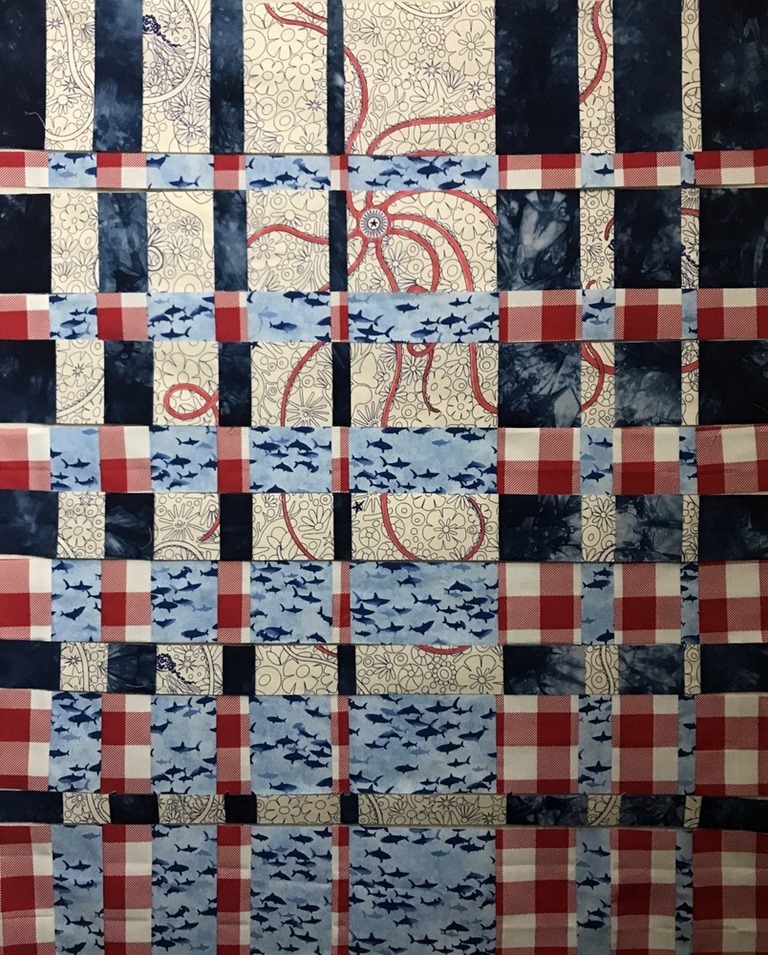
And once you do the second convergence cuts it really starts to change!
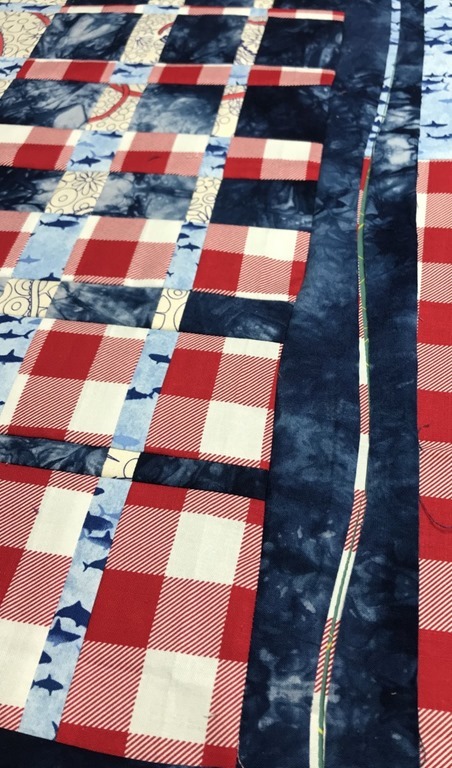
For the border I first added a strip of hand-dyed fabrics. The second strip is pieced from the other three fabrics in the convergence. I used Ricky Tims’ method for sewing soft curves to create even more interest in the border.
Once that was done … here’s what I had. I’ll admit, I am not in love with how this look. The blue fish are just too much for me. I needed to add something.
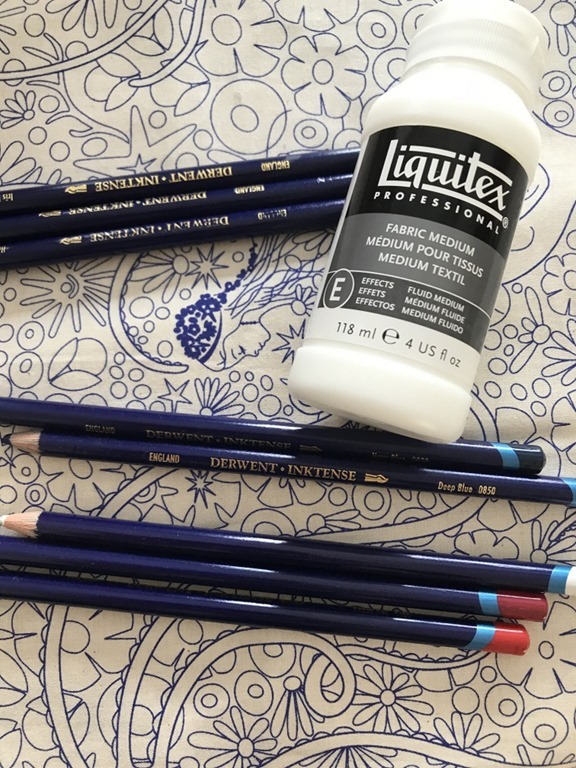
It was time to play with some of that Diving Board fabric from Alison Glass again – this time with Derwent Inktense pencils and Liquitex fabric medium.
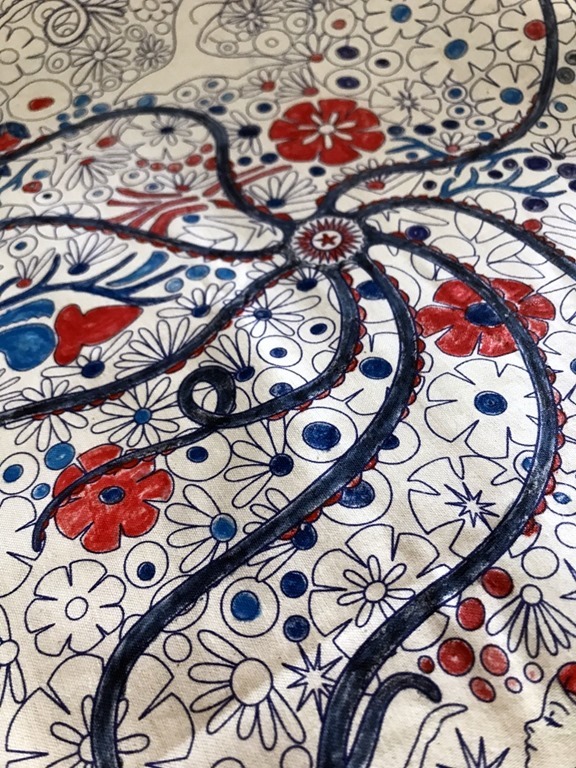
I had some fun coloring with the pencils and before I knew it I was ready to embellish the quilt. I fused Heat n Bond Lite to the back of my colored fabric.
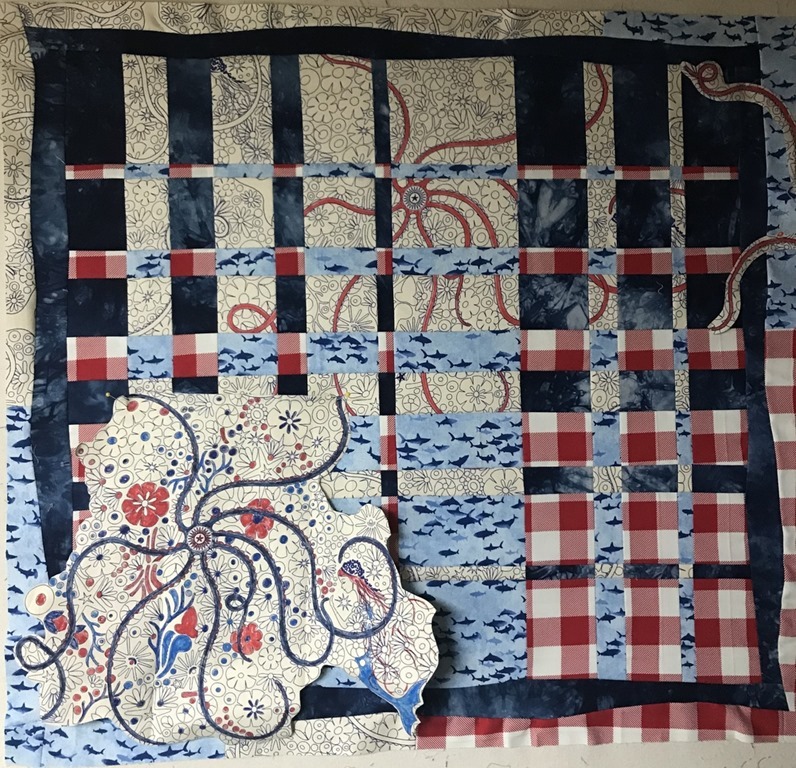
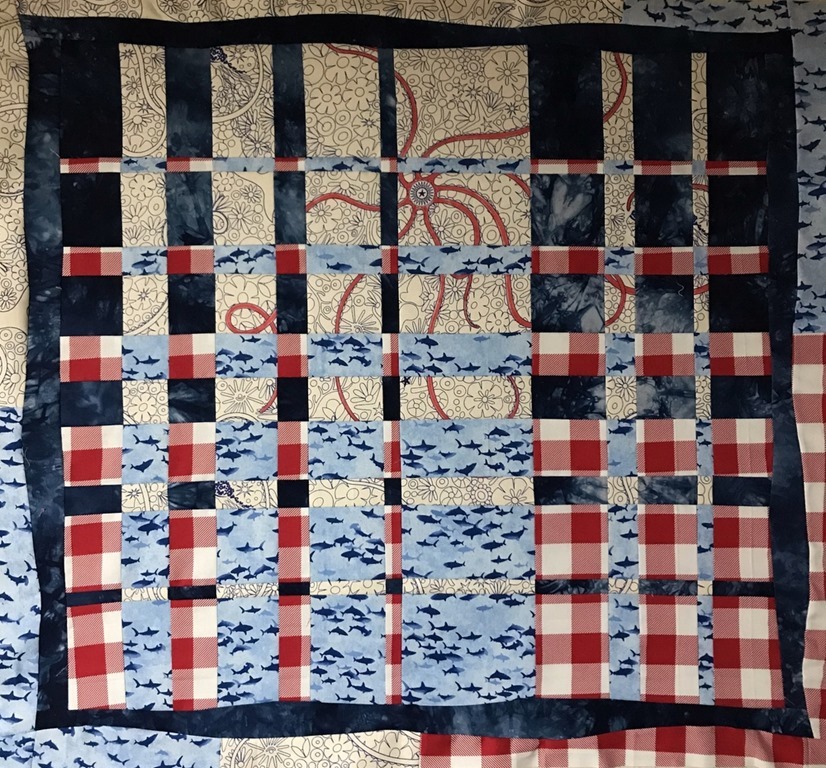
I played around with the placement of the additional octopus but it was way too much to keep it this full.
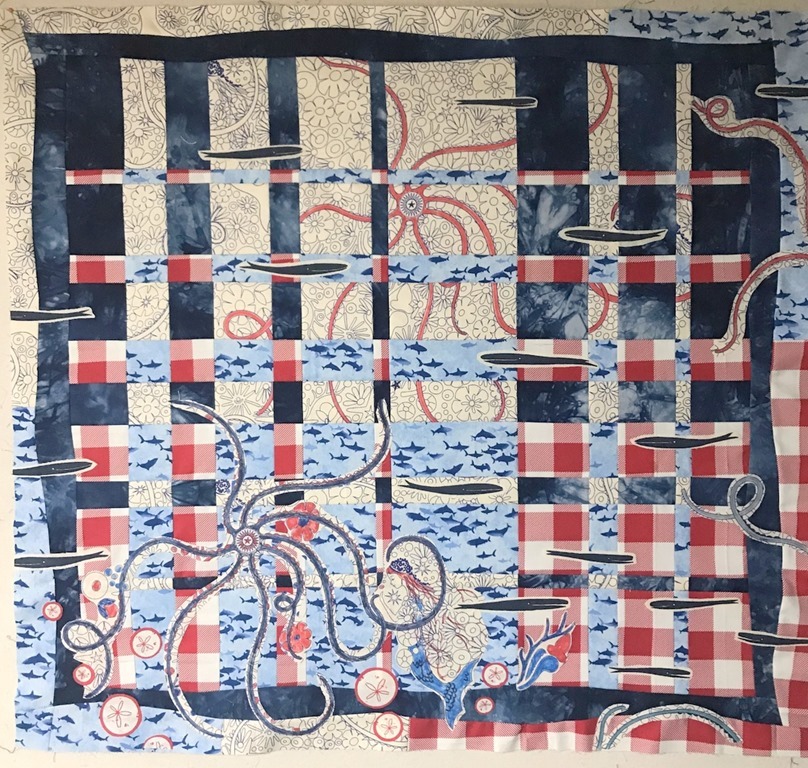
I trimmed him down some more and got it just the way I wanted to. I also fused some whales and sand dollars down from other fabrics I had. It helped create even more movement to the piece.
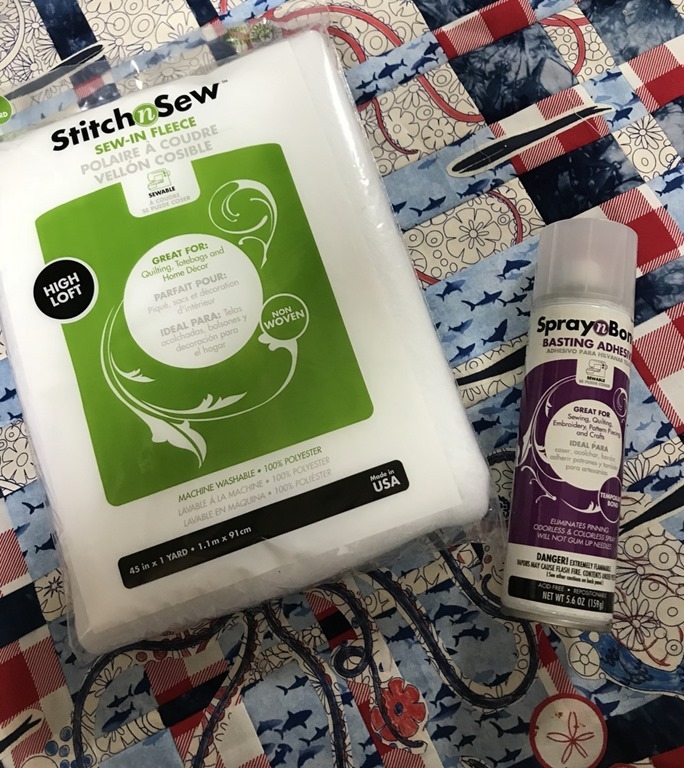
Once I was happy with how all the fused elements looked, it was time to baste the quilt! I used Stitch N Sew Sew in Fleece from Thermoweb for the batting and Spray n Baste to baste the quilt.
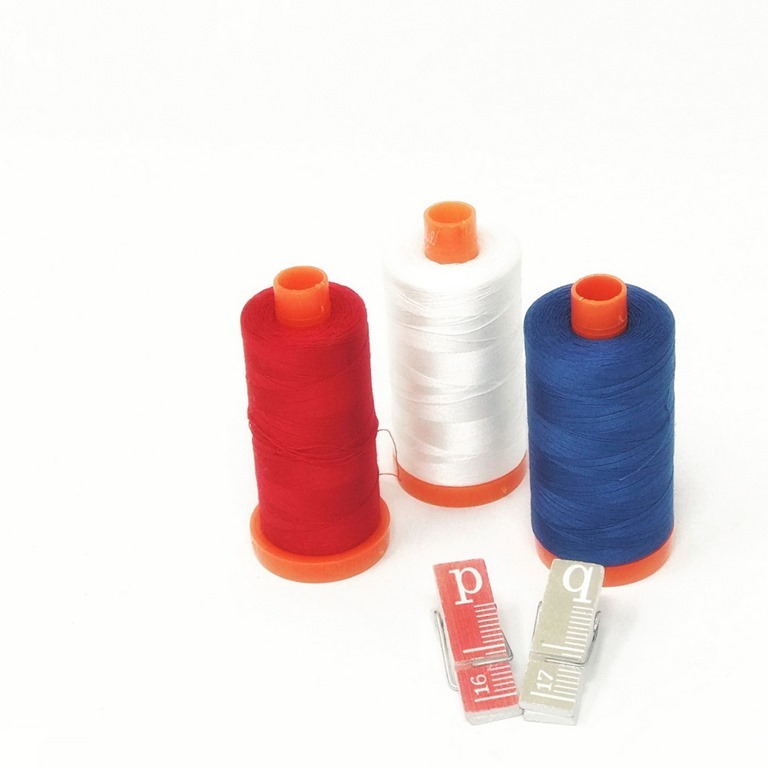
I used Aurifil thread to free motion quilt the piece on my Bernina.
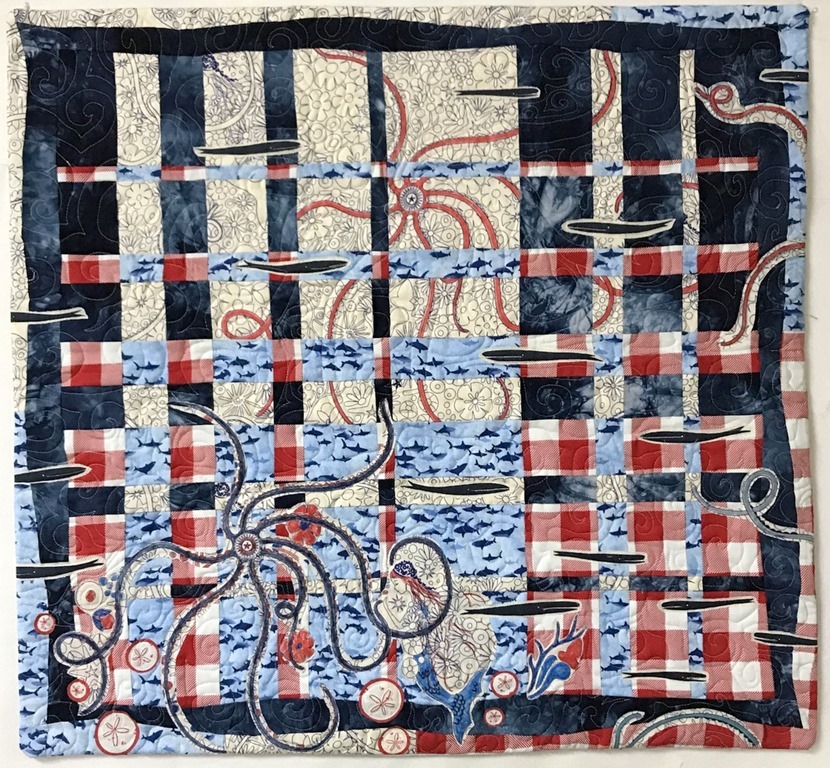
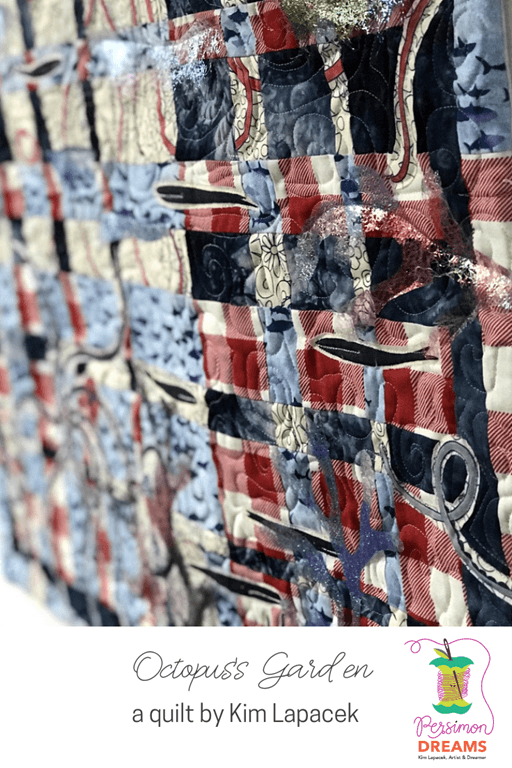
I decided to face the binding on this one and some of the whales and Octopus’s actually look as if they go off the quilts’ edge. I really wanted to add some angelina fibers to the piece because – you know – glitter is awesome.

And I think I’m happy with how that worked out. Just a bit of shine … not too much, not too little. The great thing is they’re just stitched on loosely so if I want to take the angelina fiber off it won’t be too hard. I really need to get a better picture but I’ll be gone all tomorrow morning … I’ll try to get one before the crazy snow storm hits on Monday!

Here you can see a little more detail.
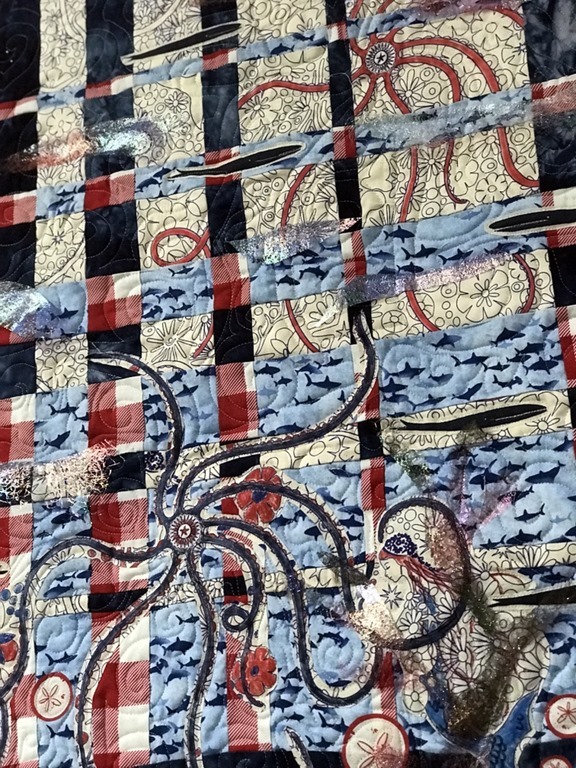
I love that the Angelina Fiber bits are translucent so you can still see the design behind them.
So there you have it! Octopus’s Garden is complete!


Comments