.png)
How to Add your Link to the Link Up
- Jan 11, 2019
- 2 min read
In order to qualify for the Project QUILTING prizes you must link up your final, completed projects before the deadline. I’ve done a tutorial in the past on how to do this but I wanted to do it again since the website has changed slightly. If you read through this and still have trouble linking up you can always email me – lapaceksorchard@gmail.com – a picture of your final quilt and the story that goes with it and I will do the posting/linking up for you. I should also note that if you’re having trouble linking up on your phone or tablet – try it on a computer.
You can link up a blogpost, an instagram picture, or a facebook picture (if you choose facebook, be sure that your sharing is “public” so folks can see your piece and read the story behind it).
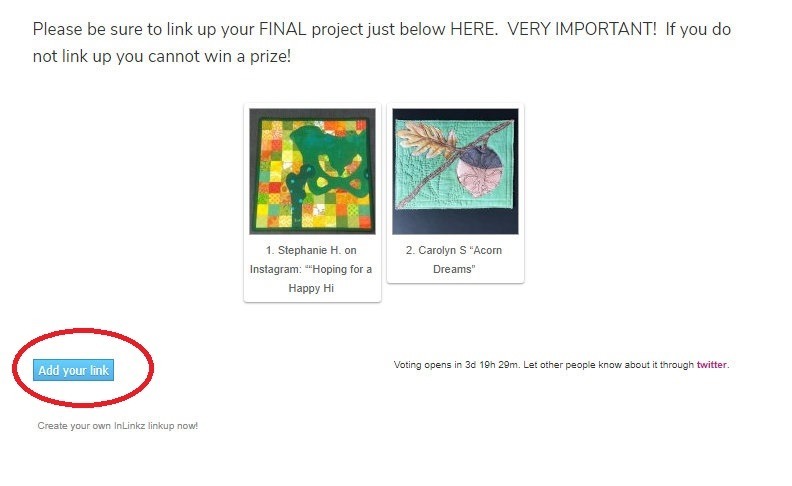
Now – click on the blue button that says “Add your link”
Find the URL for your post. These can be found in the search bar in your internet browser.

This is what it looks like on a blog post.

For an instagram link up, click on the picture of your project first and THEN grab the URL link.
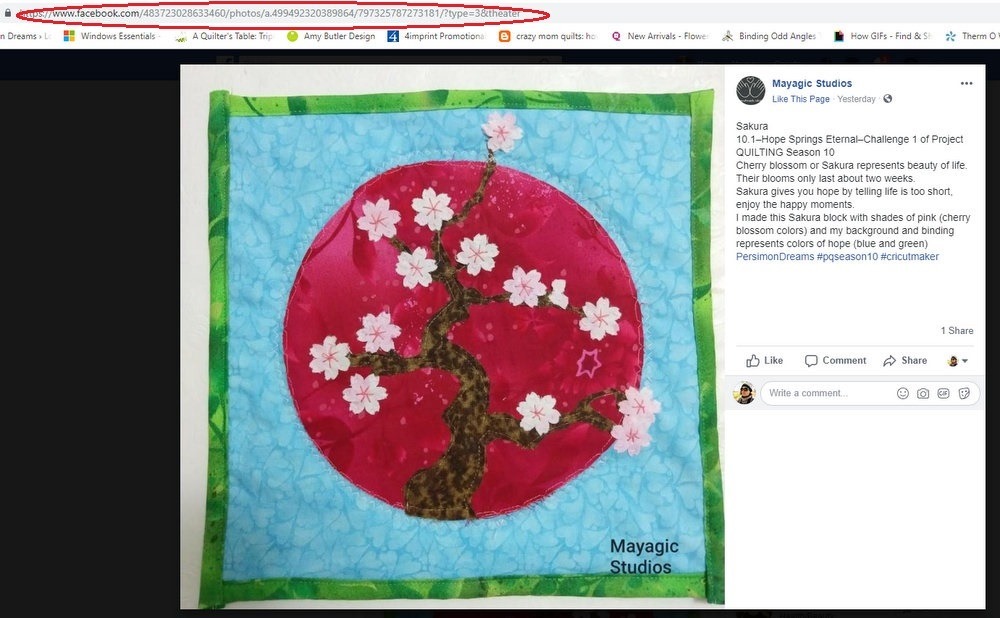
For a Facebook link up, click on the picture of the project first and then grab the URL Link.
Once you have copy and pasted the URL Link in its entirety you can finish the link up.
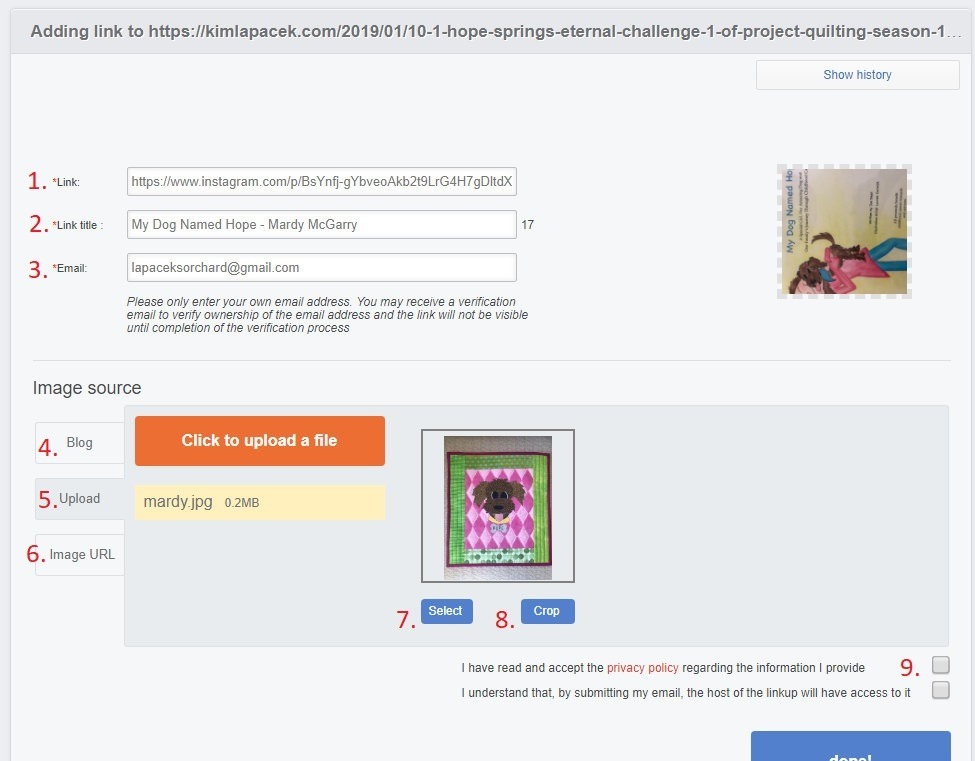
In spot 1 which says “*Link:” paste the URL link in its entirety.
Often a title automatically fills in (2) “Link title:” If you’re not happy with the title posted you can edit it – just by deleting what is there and typing what you’d like it to say. There is a limited number of characters though so keep it short and sweet.
Next (3) fill in your email.
Image source is next.

The image *should* show up when (4) “Blog” is highlighted.
If the image you want isn’t showing up you can upload (5) your own image by clicking the orange “click to upload a file” box. You shouldn’t have to do anything with (6) Image URL so feel free to ignore that box.
At this point, if you’re happy with the image you can click (7)
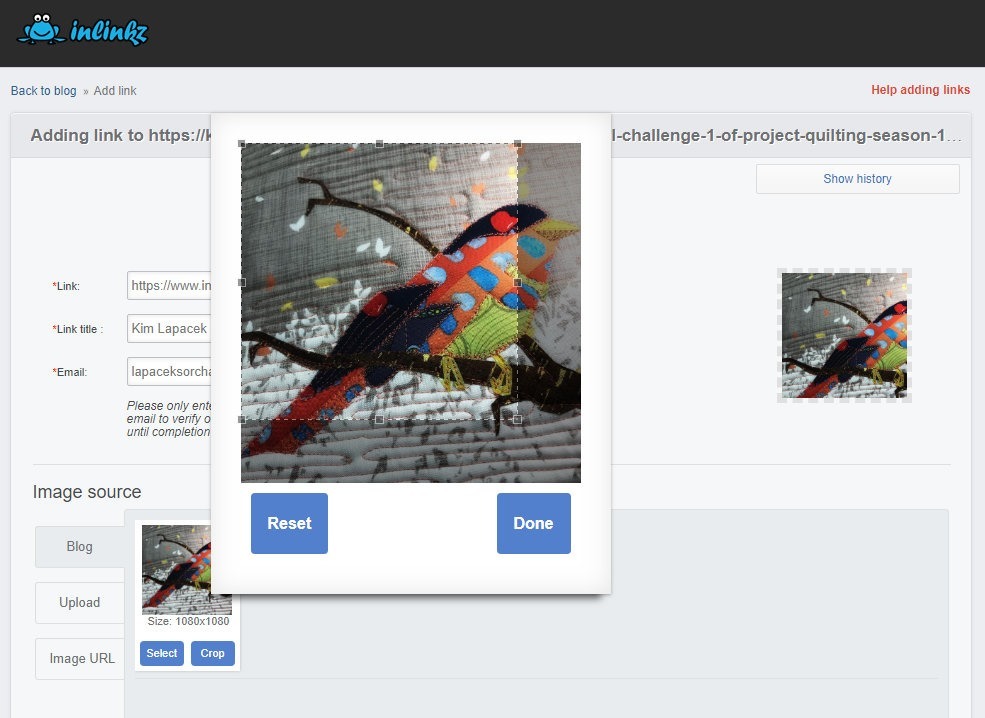
or if you want to crop the image a bit, click (8). In the image above you can see how the crop in the larger box is affecting the thumbnail folks will see (image on the right). The crop is always SQUARE so if you’re image is not square, it will be cropped. If you don’t want your quilt cropped, make sure the image you load is square.
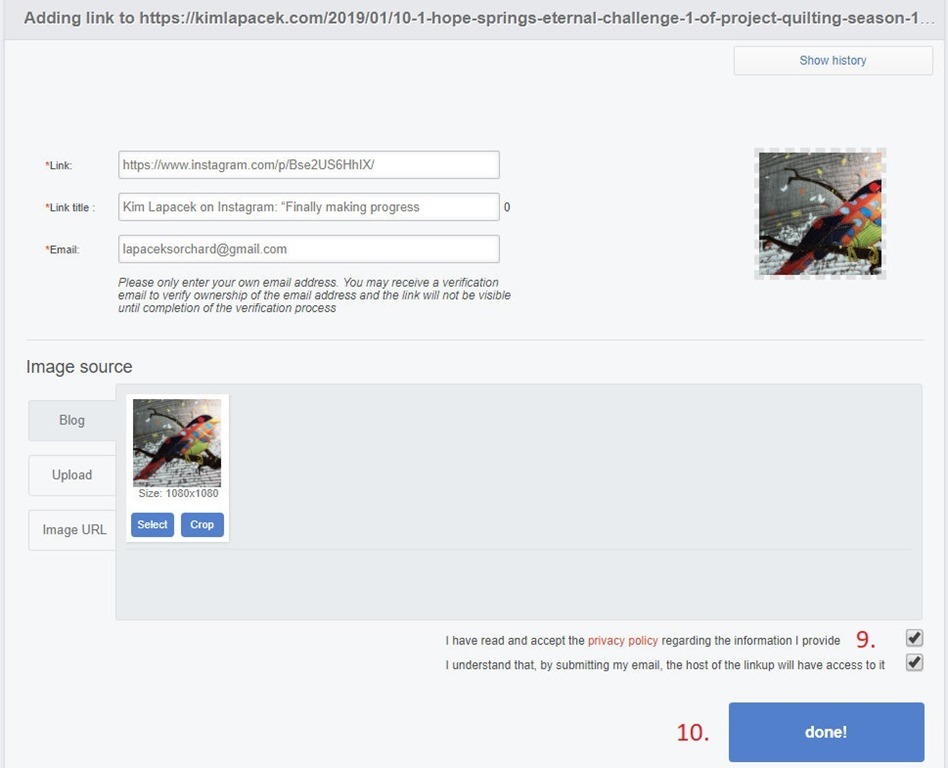
Once you’re happy with your image make sure to check the two boxes at the bottom (9).
Once everything is filled in properly click the blue “done!” box (10).
I hope this little tutorial helps you a bit!


Comments